It's that time of year - the Holidays. People have parties to go to, shopping to complete, and cards to write. I am behind in all of these categories. Manissa asked a few weeks ago for suggestions for quick, easy, and fun items to prepare for holiday parties. While others have been holiday-party-hopping for weeks now, my first one was today, Evan's family's annual Chanukkah Party. So until now the need to bring food to parties has not been a pressing reality. This all changed yesterday. I decided to make truffles, fudge, biscotti and chocolate bark to give as gifts. Everything came out great, even though it was my first time trying all of these recipes. Here I will share the recipes along with step-by-step instructions and pictures, as well as packaging ideas. Honestly everything was easy, and not nearly as time consuming as I thought. Each recipe is high yield, making it well worth your time.
Biscotti with Cranberries and PistachiosAdapted from
Epicurious.comI had never made biscotti before. Not only was this incredibly easy, it is also some of the best biscotti I've ever eaten. Epicurious recommends dipping an end in white chocolate, but that seemed overkill to me. You can adapt these in many ways - switching up the fruit and nut combos and dipping some in different chocolates.Ingredients2 1/4 cups all purpose flour
1 1/2 teaspoons baking powder
3/4 teaspoon salt
6 tablespoons (3/4 stick) unsalted butter, room temperature
3/4 cup sugar
2 large eggs
1 1/2 teaspoons vanilla extract
1 teaspoon whole aniseed
(I used 1 tsp Sambuca, anise-flavored liquor, instead)1 cup dried sweetened cranberries
3/4 cup shelled natural unsalted pistachios
DirectionsPreheat oven to 325°F. Line 3 large baking sheets with parchment paper. Sift first 3 ingredients into medium bowl. Using electric mixer, beat butter and sugar in large bowl to blend well. Beat in eggs 1 at a time. Mix in the vanilla and aniseed.

Beat in flour mixture just until blended. Stir in cranberries and pistachios (dough will be sticky). Turn dough out onto lightly floured surface.


Gather dough together; divide in half. Roll each half into 15-inch-long log (about 1 1/4 inches wide). Carefully transfer logs to 1 prepared baking sheet, spacing 3 inches apart.

Bake logs until almost firm to touch but still pale, about 28 minutes. Cool logs on baking sheet 10 minutes. Maintain oven temperature. Carefully transfer logs still on parchment to cutting board. Using serrated knife and gentle sawing motion, cut logs crosswise into generous 1/2-inch-thick slices.

Place slices, 1 cut side down, on remaining 2 prepared sheets. Bake until firm and pale golden, about 9 minutes per side. Transfer cookies to racks and cool.

Once the biscotti have cooled, you can package them in a number of different ways. Place them in a tin or pastry box. I place four biscotti in a small plastic bag and tied each one with ribbon.
 Winter Bark
Adapted from
Martha Stewart LivingWhat's great about making bark is that it is so versatile. You can add anything you want, and use any kind of chocolate. I made two varieties - one with dark chocolate with white chocolate swirl, dried cherries, and pecans. The other had milk chocolate, white chocolate swirl, cranberries, and walnuts. Make it to suit your tastes and get creative!Ingredients8 ounces white chocolate, chopped
12 ounces bittersweet chocolate, chopped (or whatever chocolate!)
7 ounces of any kind of nut and/or dried fruit
Directions
Place white chocolate in a heatproof bowl set over a pan of simmering water, stirring occasionally, until chocolate melts. Remove from heat. OR, for a quicker version, put in a microwave-safe bowl and microwave for about 30 seconds, stir, and repeat.
Melt bittersweet chocolate in a heatproof bowl set over a pot of simmering water, stirring occasionally (or microwave). Stir in nuts/dried fruit. Spread on a parchment-lined rimmed baking sheet, spreading nuts/fruit in a single layer. Drop spoonfuls of white chocolate on top, and swirl chocolates with a skewer. Refrigerate until set, about 1 hour.  Break bark into large pieces. Bark will keep, covered and refrigerated, for up to 2 weeks.


Place the bark in a parchment-lined pastry box, a pretty canister, or as I did - wrapped in cellophane baggies and tied with a bow. Pretty as can be.
 Penuche Fudge
From
Martha Stewart LivingMakes 18 Pieces
IngredientsVegetable oil cooking spray
1 can (5 ounces) evaporated milk
1 1/2 cups packed light-brown sugar
5 ounces (1 1/4 sticks) unsalted butter
1/4 teaspoon salt
1/2 cup confectioners' sugar
1 teaspoon pure vanilla extract
3 ounces toasted walnuts, chopped (1 cup)
Directions
Coat a 5-by-10-inch loaf pan with cooking spray. Line with plastic wrap leaving a 2-inch overhang on 2 sides.
Bring evaporated milk, brown sugar, butter, and salt to a boil in a medium saucepan, stirring constantly. Reduce heat to medium-low, and simmer, stirring frequently, until mixture registers 236 degrees on a candy thermometer, about 25 minutes. (I did not have a candy thermometer, but followed the time suggestion and stirred often, and it was perfect).
 Transfer to a mixer bowl, and beat in confectioners' sugar on low speed. Scrape down sides of bowl as needed. Increase speed to medium, and beat until mixture is thickened and smooth, 2 to 4 minutes. Reduce speed to low, and add vanilla and walnuts.
Spread mixture in pan, smoothing top. Refrigerate, uncovered, until firm, about 25 minutes. Unmold fudge using plastic overhang, and discard plastic. Cut into 18 pieces. Penuche will keep, covered, for up to 1 week.
You can cut the fudge to be any size you want, which gives you flexibility in terms of packaging. Once again, any sort of box or tin would be lovely. I presented it in two ways. One, I placed two square pieces of fudge in a cellophane baggie and tied with a bow. I also cut even smaller pieces of the fudge and placed them in small tins, alternating them with truffles in a pastry box (see below for pictures).

Chocolate TrufflesAdapted from
Epicurious.comI looked at many truffle recipes and finally decided on one. Still, I borrowed from others. THe original recipe calls for putting some chocolate on a glove before rolling the cooled ganache, but I just found that this melted them. I actually deviated from the instructions quite a bit, but it worked out just fine. Once you get the basic recipe down, experiment with flavors - Earl Tea infused, mocha, put a cherry in the middle, etc... The possibilities are endless.Ingredients11 ounces Valrhona chocolate (56% cacao)
(I used Trader Joe's Bittersweet chocolate)2/3 cup heavy cream
Cocoa powder for dusting
DirectionsFinely chop 8 ounces of the chocolate and put in a bowl
(I just broke it in pieces).
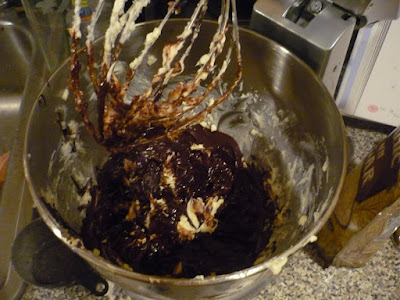
Set up a double boiler. I put water to boil in a pot, then placed a glass bowl on top. Bring heavy cream to a boil in the bowl. Add the chocolate to the hot cream. Stir with a whisk or wooden spoon in concentric circles (don't beat or you'll incorporate air), starting in the center and working your way to the edge, until the ganache is smooth.

Let the ganache cool to room temperature, then put the bowl in the freezer. I left it in the freezer for an hour and then moved it to the fridge for a little over an hour. You want the ganache to have hardened enough that you can mold it.
Remove the ganache from the fridge. Sprinkle some cocoa powder on a plate. Using clean hands, take a little at a time and roughly roll the chocolate in your palms, making a ball. Roll the chocolate in the cocoa powder to coat it, and place it in a clean container. Wash your hands frequently to prevent sloppy truffles.

When the truffles are complete, put them back in the refrigerator until they are ready to be served or packaged.

I got mini red foil liners (they look like mini-muffin cups) that were just perfect for the truffles. Put them in there and the truffles look like they came right out of the chocolatier.
Broadway Panhandler on 8th Street by Broadway is a good source for these sorts of supplies. They also had gold truffle boxes, which, when assembled, fit two truffles and look very professional.

I decided to package the truffles and pieces of fudge together in a parchment-lined pastry box. Cut the fudge into small pieces and place in the truffle tins. Alternate truffles and fudge. If I had more time I would have liked to make dividers for the boxes - they definitely shifted in movement and did not look as pretty when people opened them. Next time.


Now to put all these goodies together! Baskets always make everything look nice, and are a great way to present homemade treats. Often you can find baskets on sale at home good and craft stores, as well as at flea markets and places like Housing Works. I try to stock up. I placed the box with truffles and fudge in the center, and made labels to go on them. Around the box I put a bag each of the fudge, each kind of bark, and the biscotti. I also tied a ribbon to it with a Hannukah cookie cutter attached. If time had permitted, gift baskets look especially polished when wrapped in cellophane with a big bow. You can also place them in tissue-paper lined gift bags.


