Wednesday, December 24, 2008

Channukah Dinner

Monday night Evan and I went to his parents house to celebrate Channukah. His mother prepared a delicious meal with panko-crusted chicken breasts, potato latkes, steamed broccoli and salad - and she shared some of the recipes with me. For dessert we had a rich chocolate cake from Citarella for Evan's belated birthday.


Panko Crusted Chicken Breast
Use as many chicken breasts as you would like to have. Dip each in an egg that has been beaten and mixed with salt and pepper. From there dip it in panko (Japanese breadcrumbs). Brown each side in a skillet, then put the chicken breasts in a 350 degree oven for about half an hour.

Potato Latkes
These latkes come out crispy on the outside and soft on the inside!
Peel 4 huge Idaho potatoes and shred in a large cuisinart along with 2 onions. Move to a large bowl and bix with 4 eggs, 1 cup Motzah meal, Kosher salt and ground pepper.

Heat vegetable oil in a skillet. Fill a heaping 1/3 cup with the potato mixture and place in the hot skillet, patting down with the bottom of the measuring cup. When browned, flip. Remove finished latkes from pan and blot with paper towels. To keep them warm and crispy until serving, store latkes in a 350 degree oven.

Annual Gingerbread House Competition

The holiday season would not be complete without gingerbread houses, and what better way to celebrate and display your holiday spirit than with a competition? On Saturday night Evan and I braved it through the unpleasant weather to the warmth of Sean and Nick's Third Annual Holiday Party and Gingerbread House Competition. Over the years things have gotten pretty serious. People plan ahead of time. Houses get more outlandish. There is more yelling. This year also showed the best contestants I have seen, with creativity and innovation.

As per usual, each team was given a few boxes of graham crackers, two tubs of vanilla frosting, and a whole lot of candy. This year we were told in the middle of the competition that we could use "anything in the kitchen" and one team used eggs, to the discontent of some.

I won't tell you who won - you be the judge:

Medieval Castle in France - complete with Fire-breathing Dragon and Beheading


Washington, DC on Inauguration Day 2009


The Pyramid of Giza and Sphinx, Complete with Desert and the Nile River


"Old Lady Housing" - in a Shoe

Thursday, December 18, 2008

Chocolate Buttermilk Layer Cake with Mocha Buttercream

Evan's birthday was on Wednesday, December 17 - Happy Birthday Evan!! In celebration I made him a birthday cake on Tuesday night (since I knew I wouldn't have time on Wednesday). I decided on a Chocolate Buttermilk Layer Cake with Mocha Buttercream out of the Magnolia Bakery Cookbook. Although I'm not a huge fan of Magnolia generally, their cookbook does have good recipes. An inside source tells me that they actually use a lot more sugar than the recipe calls for when making the cupcakes and other concoctions in the bakery. Go figure. And who knew that they've opened so many outposts? I just passed one near Rockefeller Center, and I hear there are one or two by Lincoln Center, plus one further uptown. At the very least perhaps it will help to unclog the village of confused tourists looking for that bakery they saw on Sex and the City.

For a good article on the importance of following baking recipes precisely, particularly the temperature of butter, see this NY Times article from the 17th. Also, while I was super excited to be able to break out my KitchenAid Mixer, I definitely made a similar cake last year for Evan's birthday with no fancy devices; just beat everything a little longer.

Chocolate Buttermilk Layer Cake
Adapted from the Magnolia Bakery Cookbook

Ingredients
2 cups all-purpose flour
1 teaspoon baking soda
1 cup (2 sticks) unsalted butter, softened
1 cup sugar
1 cup firmly packed light brown sugar
4 large eggs, room temperature
6 ounces unsweetened chocolate, melted (either in microwave or over double boiler)
1 cup buttermilk
1 teaspoon vanilla extract

Directions
Preheat oven to 350 degrees.
Grease and lightly flour two 9 x 2-inch round cake pans, then line the bottoms with wax paper (I actually found that all of my cake pans are 1 1/2-inches deep...).

In a medium-size bowl, sift together the flour and the baking soda. Set aside.

In a large bowl, cream the butter and the sugars until smooth, about 3 minutes.

Add the eggs one at a time, beating well after each addition.

Add the chocolate, mixing until well-incorporated.

Add the dry ingredients in thirds, alternating with the buttermilk and the vanilla extract, beating after each addition until smooth. Divide the cake batter between the prepared pans and bake for 25-35 minutes or until a cake tester (or fork, or toothpick) comes out clean.

Let cakes cool in pan for 10 minutes. Remove from pans and cool completely on wire racks (or plates...). Alternately, you could also make cupcakes by lining two 12-cup muffin tins with cupcake papers, filling them three-quarters with the batter, and baking for 20-22 minutes.

When the cake has cooled completely (yes, you have to wait until it is totally cool), ice between the layers, then on the top and sides of the cake (see icing recipe and tips below). Although they recommend the Traditional Vanilla or Chocolate Buttercream, I went for Mocha, which was awesome.

Mocha Buttercream
For regular chocolate buttercream, simply omit the espresso powder.
Adapted from the Magnolia Bakery Cookbook

Ingredients
1 cup (2 sticks) unsalted butter, very soft
1 tablespoon plus 1 teaspoon milk
6 ounces semisweet chocolate, melted and cooled to lukewarm
1 teaspoon vanilla extract
1 1/4 cups sifted confectioners sugar
2-3 teaspoons instant espresso powder

Directions
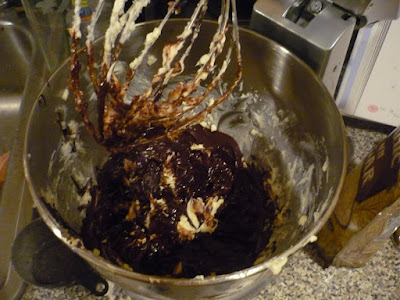
In a medium-size bowl, beat the butter until creamy, about 3 minutes. Add the milk carefully and beat until smooth. Add the melted chocolate and beat well.

Add the vanilla extract and beat for 3 minutes. Gradually add the sugar and espresso powder, tasting until you like the taste (you don't have to add all the sugar). Beat until creamy and of desired consistency. I followed their recommendation and beat it for longer than you would think to make it extra creamy. This definitely got rid of any graininess from the espresso powder.

Now you are ready to ice your cake. If you want a professional finish, it's easy with one tool - the pastry knife. My sister, a former Magnolia cupcake icer, gave me one last Christmas along with some tips on how to use it.

With your pastry knife, gather a good amount of the icing on the side of the bowl and flatten it, smoothing back and forth with the pastry knife. Take what has accumulated on the knife and begin icing in the middle of the top of the cake (or cupcake). It's best if you have a surface you can twirl on, dabbing the icing as you twirl. Even if you just put the icing on as regular, with the pastry knife it looks way more professional.

Placed on a covered cake stand, you're ready for business. Or delicious cake-eating time.

The cake was good. Again, be sure to follow the directions precisely. The Mocha Buttercream was awesome and totally easy. Enjoy!

Sunday, December 14, 2008

Holiday Treats to Impress: Truffles, Biscotti, Fudge, and Chocolate Bark

It's that time of year - the Holidays. People have parties to go to, shopping to complete, and cards to write. I am behind in all of these categories. Manissa asked a few weeks ago for suggestions for quick, easy, and fun items to prepare for holiday parties. While others have been holiday-party-hopping for weeks now, my first one was today, Evan's family's annual Chanukkah Party. So until now the need to bring food to parties has not been a pressing reality. This all changed yesterday. I decided to make truffles, fudge, biscotti and chocolate bark to give as gifts. Everything came out great, even though it was my first time trying all of these recipes. Here I will share the recipes along with step-by-step instructions and pictures, as well as packaging ideas. Honestly everything was easy, and not nearly as time consuming as I thought. Each recipe is high yield, making it well worth your time.

Biscotti with Cranberries and Pistachios
Adapted from Epicurious.com

I had never made biscotti before. Not only was this incredibly easy, it is also some of the best biscotti I've ever eaten. Epicurious recommends dipping an end in white chocolate, but that seemed overkill to me. You can adapt these in many ways - switching up the fruit and nut combos and dipping some in different chocolates.

Ingredients
2 1/4 cups all purpose flour
1 1/2 teaspoons baking powder
3/4 teaspoon salt
6 tablespoons (3/4 stick) unsalted butter, room temperature
3/4 cup sugar
2 large eggs
1 1/2 teaspoons vanilla extract
1 teaspoon whole aniseed (I used 1 tsp Sambuca, anise-flavored liquor, instead)
1 cup dried sweetened cranberries
3/4 cup shelled natural unsalted pistachios

Directions
Preheat oven to 325°F. Line 3 large baking sheets with parchment paper. Sift first 3 ingredients into medium bowl. Using electric mixer, beat butter and sugar in large bowl to blend well. Beat in eggs 1 at a time. Mix in the vanilla and aniseed.

Beat in flour mixture just until blended. Stir in cranberries and pistachios (dough will be sticky). Turn dough out onto lightly floured surface.


Gather dough together; divide in half. Roll each half into 15-inch-long log (about 1 1/4 inches wide). Carefully transfer logs to 1 prepared baking sheet, spacing 3 inches apart.

Bake logs until almost firm to touch but still pale, about 28 minutes. Cool logs on baking sheet 10 minutes. Maintain oven temperature. Carefully transfer logs still on parchment to cutting board. Using serrated knife and gentle sawing motion, cut logs crosswise into generous 1/2-inch-thick slices. Place slices, 1 cut side down, on remaining 2 prepared sheets. Bake until firm and pale golden, about 9 minutes per side. Transfer cookies to racks and cool.

Once the biscotti have cooled, you can package them in a number of different ways. Place them in a tin or pastry box. I place four biscotti in a small plastic bag and tied each one with ribbon.


Winter Bark
Adapted from Martha Stewart Living

What's great about making bark is that it is so versatile. You can add anything you want, and use any kind of chocolate. I made two varieties - one with dark chocolate with white chocolate swirl, dried cherries, and pecans. The other had milk chocolate, white chocolate swirl, cranberries, and walnuts. Make it to suit your tastes and get creative!

Ingredients
8 ounces white chocolate, chopped
12 ounces bittersweet chocolate, chopped (or whatever chocolate!)
7 ounces of any kind of nut and/or dried fruit

Directions
Place white chocolate in a heatproof bowl set over a pan of simmering water, stirring occasionally, until chocolate melts. Remove from heat. OR, for a quicker version, put in a microwave-safe bowl and microwave for about 30 seconds, stir, and repeat.


Melt bittersweet chocolate in a heatproof bowl set over a pot of simmering water, stirring occasionally (or microwave). Stir in nuts/dried fruit. Spread on a parchment-lined rimmed baking sheet, spreading nuts/fruit in a single layer. Drop spoonfuls of white chocolate on top, and swirl chocolates with a skewer. Refrigerate until set, about 1 hour.


Break bark into large pieces. Bark will keep, covered and refrigerated, for up to 2 weeks.


Place the bark in a parchment-lined pastry box, a pretty canister, or as I did - wrapped in cellophane baggies and tied with a bow. Pretty as can be.


Penuche Fudge
From Martha Stewart Living
Makes 18 Pieces

Ingredients
Vegetable oil cooking spray
1 can (5 ounces) evaporated milk
1 1/2 cups packed light-brown sugar
5 ounces (1 1/4 sticks) unsalted butter
1/4 teaspoon salt
1/2 cup confectioners' sugar
1 teaspoon pure vanilla extract
3 ounces toasted walnuts, chopped (1 cup)

Directions
Coat a 5-by-10-inch loaf pan with cooking spray. Line with plastic wrap leaving a 2-inch overhang on 2 sides.


Bring evaporated milk, brown sugar, butter, and salt to a boil in a medium saucepan, stirring constantly. Reduce heat to medium-low, and simmer, stirring frequently, until mixture registers 236 degrees on a candy thermometer, about 25 minutes. (I did not have a candy thermometer, but followed the time suggestion and stirred often, and it was perfect).

Transfer to a mixer bowl, and beat in confectioners' sugar on low speed. Scrape down sides of bowl as needed. Increase speed to medium, and beat until mixture is thickened and smooth, 2 to 4 minutes. Reduce speed to low, and add vanilla and walnuts.

Spread mixture in pan, smoothing top. Refrigerate, uncovered, until firm, about 25 minutes. Unmold fudge using plastic overhang, and discard plastic. Cut into 18 pieces. Penuche will keep, covered, for up to 1 week.


You can cut the fudge to be any size you want, which gives you flexibility in terms of packaging. Once again, any sort of box or tin would be lovely. I presented it in two ways. One, I placed two square pieces of fudge in a cellophane baggie and tied with a bow. I also cut even smaller pieces of the fudge and placed them in small tins, alternating them with truffles in a pastry box (see below for pictures).


Chocolate Truffles
Adapted from Epicurious.com
I looked at many truffle recipes and finally decided on one. Still, I borrowed from others. THe original recipe calls for putting some chocolate on a glove before rolling the cooled ganache, but I just found that this melted them. I actually deviated from the instructions quite a bit, but it worked out just fine. Once you get the basic recipe down, experiment with flavors - Earl Tea infused, mocha, put a cherry in the middle, etc... The possibilities are endless.

Ingredients
11 ounces Valrhona chocolate (56% cacao) (I used Trader Joe's Bittersweet chocolate)
2/3 cup heavy cream
Cocoa powder for dusting

Directions
Finely chop 8 ounces of the chocolate and put in a bowl (I just broke it in pieces).

Set up a double boiler. I put water to boil in a pot, then placed a glass bowl on top. Bring heavy cream to a boil in the bowl. Add the chocolate to the hot cream. Stir with a whisk or wooden spoon in concentric circles (don't beat or you'll incorporate air), starting in the center and working your way to the edge, until the ganache is smooth.

Let the ganache cool to room temperature, then put the bowl in the freezer. I left it in the freezer for an hour and then moved it to the fridge for a little over an hour. You want the ganache to have hardened enough that you can mold it.

Remove the ganache from the fridge. Sprinkle some cocoa powder on a plate. Using clean hands, take a little at a time and roughly roll the chocolate in your palms, making a ball. Roll the chocolate in the cocoa powder to coat it, and place it in a clean container. Wash your hands frequently to prevent sloppy truffles.

When the truffles are complete, put them back in the refrigerator until they are ready to be served or packaged.

I got mini red foil liners (they look like mini-muffin cups) that were just perfect for the truffles. Put them in there and the truffles look like they came right out of the chocolatier. Broadway Panhandler on 8th Street by Broadway is a good source for these sorts of supplies. They also had gold truffle boxes, which, when assembled, fit two truffles and look very professional.

I decided to package the truffles and pieces of fudge together in a parchment-lined pastry box. Cut the fudge into small pieces and place in the truffle tins. Alternate truffles and fudge. If I had more time I would have liked to make dividers for the boxes - they definitely shifted in movement and did not look as pretty when people opened them. Next time.


Now to put all these goodies together! Baskets always make everything look nice, and are a great way to present homemade treats. Often you can find baskets on sale at home good and craft stores, as well as at flea markets and places like Housing Works. I try to stock up. I placed the box with truffles and fudge in the center, and made labels to go on them. Around the box I put a bag each of the fudge, each kind of bark, and the biscotti. I also tied a ribbon to it with a Hannukah cookie cutter attached. If time had permitted, gift baskets look especially polished when wrapped in cellophane with a big bow. You can also place them in tissue-paper lined gift bags.


Out on the Town: Perbacco

Our friend Peter has been recommending Perbacco, on East Fourth Street and Avenue B, for a few months now. Raving that it is currently the best restaurant in New York, he goes there nearly every week to enjoy their creative take on Italian cuisine. We were supposed to meet him for dinner, but when he was unable to join us we decided to go anyway. I am so glad we did. The restaurant is small but comfortable. There are three long wine bar-style tables, plus regular dinner tables. At 8:30 on a Friday night the place was full, but we were seated instantly. Of course, I have noticed that recently (recession much?) there have been much shorter waits in restaurants. The waiter could not have been more lovely and attentive.

We drank a reasonably priced wine and started with two appetizers. The Salciccia Di Gamberi E Capesante - home made shrimp and scallop sausage over a bed of chickpea simmered in a shrimp broth - was divine. Although it tasted strongly of fish, it was far from 'fishy.' It was a hearty, savory way to begin the meal. We also could not resist the Creme Brule' Di Parmigiano Reggiano - crème brule with a balsamic vinegar reduction. It lived up to all of our hopes. The top cracked with a spoon like traditional creme brulee, but rather than a sweet center we were treated to a creamy Parmesan taste explosion. It was certainly strong, but not overpowering. The balsamic reduction provided a slightly sweet counterpoint, representing a new take on a classic pairing.

For the main course Evan ordered the Spaghetti Alla Carbonara Di Tonno - homemade thick spaghetti with sautéed tuna cubes in a creamy egg sauce, topped with a tuna prosciutto. Once again, a creative take on a classic dish. Although the portion was very small, such a rich dish does not need to be served large. It was surprisingly light for a cream-based dish, and the tuna provided just the right flavor.

I wanted to try something new, and so was between the beef cheeks and pork belly. These are both fairly standard to menus and are harmless meats, but something about their name has always turned me off. When I think pork belly I think intestines. Nonetheless, reassured by our helpful waiter, I ordered the Pancia Di Maiale - slow cooked pork belly in honey and black pepper sauce with broccoli rabe and roasted red onion. Words cannot describe how delicious this dish was. Pork Belly is a surprisingly lean cut of meat considering its name, and it was cooked to perfection - tender and flavorful. The honey lent sweetness to the salty pork. The broccoli rabe gave a touch of bitterness to the meal, and the onions had caramelized through roasting, and the sauce had a hint of peppery spice. The flavors worked so well together - salty, bitter, sweet, spicy - I didn't want it to be over.

Eventually the meal did end, though. There was no more food on my plate. And although we didn't order dessert the waiter, in true Italian style, made us feel as though it would be fine to sit there all night. Meals are not to be rushed, just as one should not be herded out of a restaurant. We will definitely return to Perbacco. There is a lot of exploring left to do on the menu. Thanks, Peter, for the recommendation.

Out on the Town: August

Friday afternoon I had the special treat of having lunch with my mother. Being unemployed, I was downtown getting my haircut. My mother was supposed to be working in Albany but came home to escape the ice storms that are affecting the Northeast. We went to August, on Bleeker Street between Charles and West Tenth. We had been there once before for dinner, and this was my second time there for lunch. I have yet to be disappointed.

The front of August is deceivingly small and dark. If you continue walking through the restaurant, past the kitchen and wood-burning stove, you come to a sunlight-filled enclosed garden seating area that is lovely any time of year. Particularly during lunch in the wintertime, a view of the bright sky is more than welcome. Being a random weekday, we had our choice of seats and opted for a cozy corner table. The waitress was attentive and accommodating.

I had the Grilled Chorizo with fried egg, manchego cheese, coriander pesto, and country bread. As Bon Appetit recently pointed out, putting an egg on top of dishes was one of the top culinary trends of the year - and with good reason. The chorizo, which was split and grilled, was seasoned more like merguez than your standard Spanish sausage. The fried egg could easily make this a brunch dish, and the thick country bread was spread with coriander pesto and razer thin manchego, two of my favorite foods. In fact, when we were last here for dinner we had the mussels, which came with toast with coriander pesto, and it was love at first taste. It prompted me to make my own cilantro pesto, now one of my standards.

Prompted by a discussion on our love of French Fries, we asked the waitress if we might have a side of them. She said that although that usually was not offered (even though they come with the burger...) since it was not busy she could probably make that happen. And she did. And it was worth it. The fries are seasoned and perfectly crisp, and come with homemade mayonnaise, a little on the vinegary side and delicious.

My mother had the soup and sandwich. The sandwich was a Salumi Panini, and it came with curried Pumpkin Soup. The soup, which was beautifully presented (sorry I didn't get a close-up) had a kick that offset the sweetness of the pumpkin.

August has their own pastry chef who prepares desserts on site daily. To satisfy our sweet tooth we split the Chocolate Pot de Crème. This is a super thick, rich, luxurious mousse topped with an equally decadent whipped cream. We could barely finish it between the two of us.

Simple Dinner: Manicotti

Thursday night I prepared manicotti for dinner. Once again I relied on Rafetto's to do the work for me - their manicotti is so inexpensive and so delicious, I've never even bothered attempting to make it from scratch. They freeze very nicely and are a great weeknight meal.

Layer the bottom of a baking pan with tomato sauce. Place manicotti on top. Spoon more tomato sauce over the manicotti, then cover with grated mozzerella cheese. Bake in the oven until the cheese is melted and bubbling. The cooking time will vary slightly if you are using fresh or frozen manicotti. I served it with sausage (also fresh-made from Rafetto's) and a nice large salad.